Create a new O&O DiskImage RecoveryPartition
System requirements
- Required free space: 3GB
- Required free space if the recovery partition is being used by default: at least 10% of the hard disk size but no less than 25 GB 25GB
- Used with MBR layout: maximum 3 primary partitions
- Dynamic disks are not supported
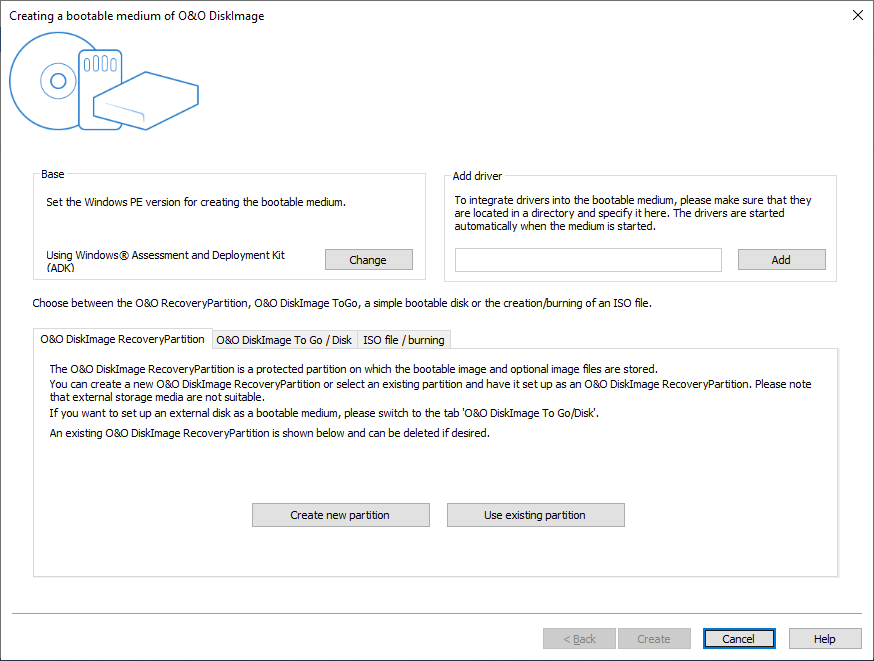
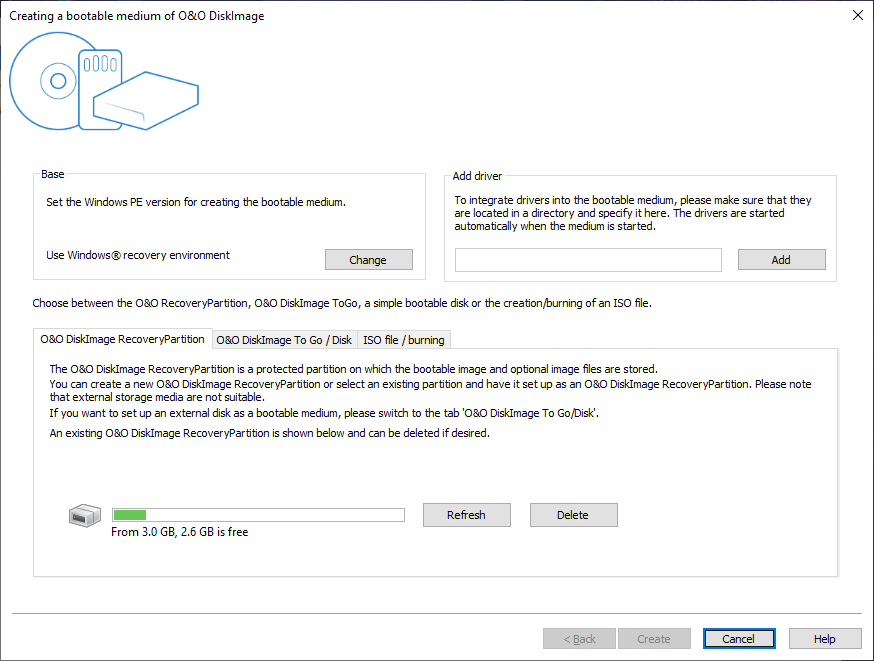
Create O&O DiskImage RecoveryPartition
The O&O DiskImage RecoveryPartition contains a bootable image and, if wanted, your backups. If ever your operating system is no longer able to start, the O&O DiskImage boot environment will start automatically. Here you’ll be able to restore backups from your O&O DiskImage RecoveryPartition or from an external disk.
O&O DiskImage RecoveryPartition
To create this kind of partition, please do as follows:
- Open O&O DiskImage and click Recovery media.
- If you already created an empty partition, select Choose.
- Or you can have O&O DiskImage create the partition for you by clicking Create.
- In the open dialog, select the drive from the dropdown menu where you want the O&O DiskImage RecoveryPartition to be created. If you want to use a partition you already created, select it from the drive list.
- You can use the O&O DiskImage RecoveryPartition as your default path for future backups. If you chose this option for creating a new partition, the O&O DiskImage RecoveryPartition created might be very large so that there’ll be enough space for backups. In the field Maximum size you can change the size of the O&O DiskImage RecoveryPartition to meet your requirements.
- By clicking OK, a bootable image will be generated. If ever an error occurs while the system is booting, the O&O DiskImage boot environment will start automatically and you’ll be able to restore a backup.
- Once creation is completed, we recommend making a complete or One-click image. To do this, switch over to Drive imaging and run the imaging option you want. If you selected the O&O DiskImage RecoveryPartition as your default backup path, the image will be saved there.
Booting from the O&O DiskImage RecoveryPartition
- Hold the shift key while clicking Restart in the start menu.
- As an alternative you can select Update & Security in Settings. Left-click Recovery in the menu. At the right under Advanced start you’ll be able to boot from the advanced start environment by clicking Restart now.
- Under Resolve problems, Advanced options select Start help to boot from the boot environment.
- If your system has a problem, the advanced start will be run automatically and under Resolve problems, Advanced options, Start help you’ll be able to boot from the O&O DiskImage RecoveryPartition and restore a backup.
Note:
After booting, the O&O DiskImage RecoveryPartition will be displayed in the O&O DiskImage interface as a drive with the last available drive letter (usually "Z").
After booting, the O&O DiskImage RecoveryPartition will be displayed in the O&O DiskImage interface as a drive with the last available drive letter (usually "Z").
Delete or update an existing O&O DiskImage RecoveryPartition
- If you already have an O&O DiskImage RecoveryPartition and wish to change or remove it, click Recovery media on the program‘s start page.
- In the opening dialog you’ll see the existing O&O DiskImage RecoveryPartition.
- Select the option Update if you want to update O&O DiskImage and use the latest version of the bootable image for your O&O DiskImage RecoveryPartition. Doing so will have not affect your backups.
- Select Delete if you want to remove the O&O DiskImage RecoveryPartition completely. The partition will then be deleted and the Windows restoration environment, if available, reactivated.
Warning:
When you select Delete, all backups on the O&O DiskImage RecoveryPartition will be lost. Use only the integrated deletion feature in O&O DiskImage to delete the O&O DiskImage RecoveryPartition. Deleting any other way could result in serious damage to the system.
When you select Delete, all backups on the O&O DiskImage RecoveryPartition will be lost. Use only the integrated deletion feature in O&O DiskImage to delete the O&O DiskImage RecoveryPartition. Deleting any other way could result in serious damage to the system.
Delete O&O DiskImageRecovery Partition