Creating a bootable medium
The bootable disk is created based on the operating system you are using. This means that if you have a 64-bit system, a 64-bit boot disk will be created. Using a 64-bit boot disk you’ll be able, among other things, to restore images of GPT hard disks under UEFI/EFI systems.
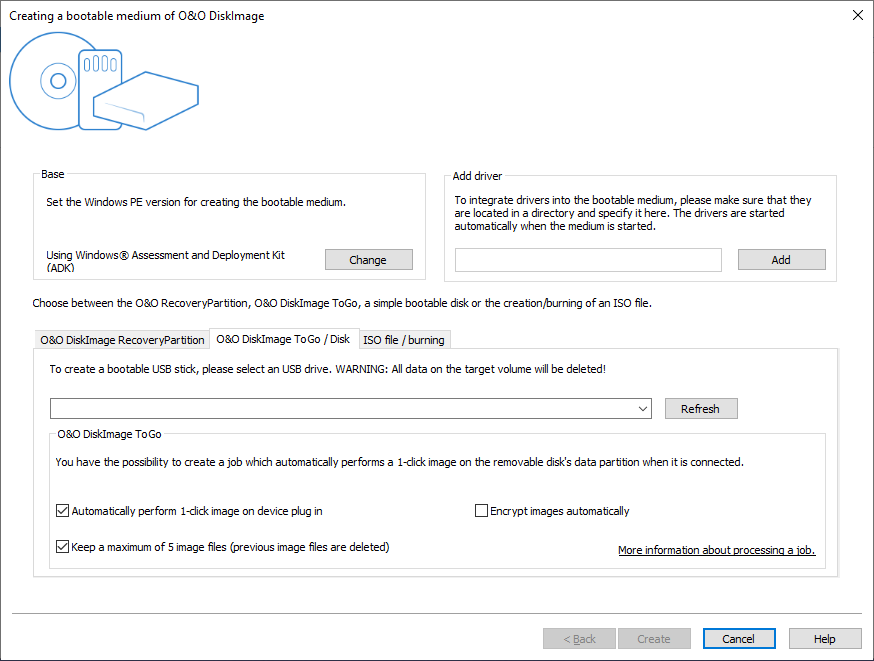
Creating a bootable disk with O&O DiskImage is possible by going to the menu item Tools -> Create bootable disk. This feature detects those options available for creating a bootable disk within the system. It will then copy all the files that are required for doing this.
The current options available for creating will be identified with a blue check ![]() . Those options not available, because their components are either not installed or not recognized, will be displayed with a blue cross
. Those options not available, because their components are either not installed or not recognized, will be displayed with a blue cross ![]() .
.
The base will be selected automatically, providing that a base can be found. You can adjust the base by clicking Change. This is, however, normally not necessary because the settings on your system and the possible bases will be adjusted automatically.
![]() Open the respective Microsoft Download page for the ADK or AIK. The Windows ADK/AIK is rather large, taking up between 1.7 – 3.4 GB. The download can therefore take up to a few hours, depending on download speed.
Open the respective Microsoft Download page for the ADK or AIK. The Windows ADK/AIK is rather large, taking up between 1.7 – 3.4 GB. The download can therefore take up to a few hours, depending on download speed.
![]() Open the respective installation file (ADK/AIK) and start it.
Open the respective installation file (ADK/AIK) and start it.
The program will first try creating a bootable disk using the Windows® recovery environment. When this isn’t possible, it will use the "Windows Assessment and Deployment Kit (ADK) for Windows®". The Kit contains a combination of tools that can be used for personalizing, evaluating, and preparing Windows operating systems for use on new computers.
| Windows 10 |
If you’re using Windows 10, install ADK10. You can download the installation file on the following page: https://msdn.microsoft.com/en-gb/en-des/windows/hardware/dn913721.aspx |
| Windows 8.1 |
If you’re using Windows 8.1, install ADK8.1. You can download the installation file on the following page: https://www.microsoft.com/en-gb/download/details.aspx?id=39982 |
| Windows 8 |
If you’re using Windows 8, install ADK8.0. You can download the installation file on the following page: https://www.microsoft.com/en-gb/download/details.aspx?id=30652 |
| Windows 7 |
If you’re using Windows 7: The Windows® Automated Installation Kit (AIK) for Windows® will help you create a bootable disk. The "Windows® Automated Installation Kit (AIK) for Windows® 7" will assist with the installation, customization, and final preparations for operating systems from the Microsoft Windows® 7 operating system family. This can be downloaded from Microsoft® under http://www.microsoft.com/en-gb/download/details.aspx?id=5753 |
As a last option, you can use the Windows® installation disk to create a bootable disk. If this option is selected, the Windows®installation disk itself will need to be directly inserted.
Individual driver integration when creating a boot medium
You can specify a driver directory so that every driver accepted by the operating system for the boot device is included in the boot media and run automatically when you boot from it. You can integrate drivers into the boot medium for all types of devices, even ones not PnP compatible.
Individual driver integration when using a boot medium
You can specify a driver directory so that every driver accepted by the offline operating system is included in the operating system and run automatically when you boot up. You can integrate drivers into the boot medium for all types of devices, even ones not PnP compatible, for example graphics cards or network cards.
The next step will involve using the data detected to create a bootable disk. You have the option to burn the CD image onto a CD/DVD or copy it onto a USB stick. Select the CD/DVD burner or USB drive you want. You also have the option of saving the CD image as an ISO file for later use. This will require your entering a file name as well as a path. To complete creation, click "Create".
On account of the limitations placed on creating Windows bootable disks, O&O DiskImage can only use 2TB for making a bootable medium. If your disk is larger than 2 TB, the remaining space cannot be used.