You can have your created image file displayed in Windows Explorer as a virtual drive. This allows you to copy files or directories from the image file onto existing hard disks.It is, however, not possible to make changes (such as deleting or adding files) to the virtual hard disk mounted from the image file.

Mount image file as a drive
- Open Tools in the menu bar and select the option Mount drive . Or use ctrl+M.
- In the dialog window, select the image file (*.omg) from which you want to mount the drive. If you are not sure, you can look up the details of the image under Image information.
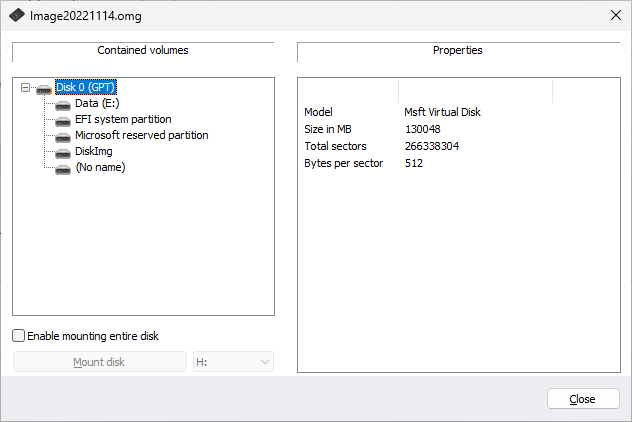
- After selecting the image file, all drives included in the image will be listed in the program window.
- Select the displayed drive from the image.
- Afterwards, you can select any name from the drive list (e.g. G:) for the drive from the image.
- Then, click Mount drive. The virtual drive from the image will then be visible as a regular drive in the Windows Explorer.
Please note that you may only access sectors which contain image files. Refreshing can take a few moments.
Please keep in mind that drives can only be mounted from an image if the image is available locally. You cannot mount a drive from an image located in the network.
Enable mounting disk:
If you create an image of one or more partitions/volumes, the image contains additional information about the disk (or hard disk) along with the imaged data. This information will concern the hard disk's structure as well as its corresponding system areas such as the master boot record, possibly existing extended boot records, the LDM (logical disk management) database or the GUID partition table. With the function Enable mounting entire disk, you can load this information or use it for acquainting the hard disk to the operating system based on the disk's original information. We recommend using this function when you want to restore deleted or destroyed data from a forensic image.
Creating a virtual disk out of an entire hard disk can result in recognition problems for the virtual disk when the following applies to the hard disk being imaged:
- defective or invalid partition tables
- partitioning process not supported by your operating system (e.g. GPT)
- dynamic hard disks containing volumes that are spanned, striped, mirrored or RAID5 when not all the hard disks being used were imaged
- encrypted hard disk
Technical limitations
- Windows refresh problem: if you're working with a remote desktop connection, a new login will be needed for displaying the mounted drives.
- Mounting images larger than 2TB is not supported by Windows XP (32-bit).
After restarting from Windows, the virtual drive is removed automatically from the drive list.
When mounting VHD / VHDX files, the following error message may appear: "File could not be mounted. The disk image is not initialized, contains partitions that cannot be recognized, or contains volumes that have not been assigned drive letters. Use disk management Snap-in to ensure that the disk, partitions, and volumes are in a usable state. " This particular error message can be ignored. Your file is integrated correctly despite the error message.