You will also find suggested solutions for making your system capable of carrying out TRIM commands to optimize your SSD.
If you have a question or if you need assistance, please contact our technical support. We look forward to hearing your suggestions!
What is TRIM and why is it necessary?
Solid State Drives store data on flash chips and because they do not contain any moving parts, they are faster than hard drives. However, flash chips have a major drawback: a limited lifetime. Upon each write request, flash memory cells experience a physical degradation and if written onto too frequently, flash memory may in fact fail.
To keep flash chips in a perfect working condition for as long as possible, the controlling processor inside an SSD must perform wear leveling by distributing recurrent writes to as many flash cells as possible. This is a proven means of preventing data from being written to just a few flash cells, ultimately leading to their destruction and the loss of all data contained on them.
This necessary function can be facilitated by software using the so-called TRIM command. Through this command the SSD is told about unused space in a file system and this free space may be then used to assist wear leveling. If used in a clever way, TRIM will extend the lifetime of a solid state drive and will improve its performance.
What is required for TRIM to work?
In order to perform TRIM optimizations of your solid state drive, the following four prerequisites must be met:
- The SSD must implement the ATA TRIM command or its equivalent SCSI UNMAP. Most drives that were introduced in the year 2010 or later should support TRIM. If the drive features SATA-600 speeds, then it is a good indicator that it supports TRIM.
- The SSD needs to be attached to a controller that will pass through TRIM commands to the drives. This is usually the case if the drive is attached to a SATA chip which is running in AHCI mode. A good sign is if the SSD is directly attached to a SATA port provided by the main chipset on the motherboard.
- If the SSD is attached to a RAID controller, it must be used as a single drive volume. In most cases RAID volumes consisting of multiple SSDs cannot be optimized by TRIM. Also, the SSD needs to be partitioned as a Basic Disk since Dynamic Volumes are not compatible with TRIM.
- The controller’s driver must not block TRIM commands and needs to pass them through to the drive. The most common reason for TRIM incompatibility lies in severely outdated drivers or OEM drivers that will not pass through TRIM commands. However, if the Standard AHCI driver which is already included in Windows is installed, then nothing should hinder a successful TRIM optimization.
Known bad configurations
We would like to present you the two most common cases for TRIM incompatibility.
SATA controller is running in IDE mode
Problem
Due to BIOS settings the SATA controller is running in the now obsolete IDE mode. When SATA was introduced over a decade ago, the IDE mode was needed to provide compatibility with existing drivers. Usually, the IDE mode is enabled by default on somewhat older motherboards.
Solution
In order to unlock the full performance potential of SSDs, the SATA controller needs to be switched to AHCI mode. As the first step the Windows registry needs to be adjusted in order to enable the AHCI driver provided by Windows. Please click here to jump directly to the instructions.
Marvell SATA controller running OEM drivers
Problem
Back when motherboard chipsets were still offering SATA-300 ports only, Marvell chips were added to premium motherboards in order to provide additional SATA-600 ports. Frequently, the same Marvell controllers were used on add-on SATA controller cards and for eSATA ports. While these chips by themselves are good SATA controllers, they will have compatibility issues if Marvell OEM drivers are used instead of the Windows’ built-in drivers, e.g. as provided on motherboard driver CDs. The problem is that these OEM drivers do not pass through any TRIM commands to the SSD. In addition, Marvell drivers simulate SATA drives as SCSI devices. This leads to severe difficulties in properly detecting an SSD as such a drive and to protect it from unnecessary defragmentation.
Solution A
One possible solution is to attach the SSD to a SATA port provided by the main motherboard chipset, if it is running in AHCI mode.
One rather common counter-argument is that the Marvell controller offers SATA-600 and thus is faster than SATA-300 provided by the main chipset. However, this is not correct: because the additional controller is attached by a narrow PCI Express x1 or x2 lane, the built-in chipset ports are not slower when measured against the usual benchmarks.
Solution B
The second solution is to use the Windows’ Standard AHCI drivers. Marvell controllers are fully compatible with the AHCI standard and if the controller is driven by standard Windows drivers, it does not show any negative performance impact. In order to use the built-in driver, the OEM driver must be replaced. This procedure is 100% safe and can be easily done using the Windows Device Manager. Please click here to jump directly to the instructions.
Your configuration is not listed?
The vast majority of compatibility problems are due to SSDs being attached to additional SATA controllers whose drivers do not pass through TRIM commands to the drive. As a rule of thumb, we recommend to replace the OEM driver with the Standard AHCI driver provided with Windows.
If our suggested solutions s did not improve the situation or if your configuration is not listed and you are in doubt as to what to do next, then please contact our technical support directly. We will be more than happy to assist you!
Which configurations are known to work?
We would like to present you a list of sample configurations which we have tested internally and which are compatible with TRIM optimizations. Please note that this list is by no means exhaustive, we provide it purely as an example of what a working configuration could look like.
|
SSD interface |
Controller |
SATA Mode |
Drivers |
Notes |
| SATA | SATA port on main chipset | AHCI | Standard AHCI drivers provided by Windows | - |
| SATA | SATA port on main chipset (Intel or AMD) | AHCI | Current version of manufacturer’s drivers | Chipset drivers must be up to date. |
| SATA | SATA port on additional controller (e.g. Marvell) | AHCI | Standard AHCI drivers provided by Windows | Sometimes OEM drivers are incompatible with TRIM. We suggest using the standard AHCI drivers. |
| SATA | SATA port on main chipset (Intel or AMD) | RAID | Current version of manufacturer’s drivers | SSD must be used as a single drive; RAID volumes consisting of SSDs are not supported. Chipset drivers must be up to date. |
| SATA | SAS host bus adapter (e.g. LSI Logic or Adaptec) | - | Firmware and drivers must be up to date. | Controller needs to implement SCSI ATA Translation Layer. |
| SAS | SAS host bus adapter | - | - | - |
Suggested Solutions for the most common cases
Switching from obsolete IDE mode to AHCI mode
Before you change the SATA mode in the computer’s BIOS, some preparatory steps are necessary. These steps are required to enable the AHCI SATA driver to start upon booting. If not carried out properly, the system will not be able to boot if switched to AHCI mode.
If you have changed the SATA mode to AHCI without first activating the appropriate drivers, the system will likely not boot. While this may be an unpleasant experience, there is a simple remedy. Simply switch the SATA mode back to IDE and execute the preparatory step and try again.
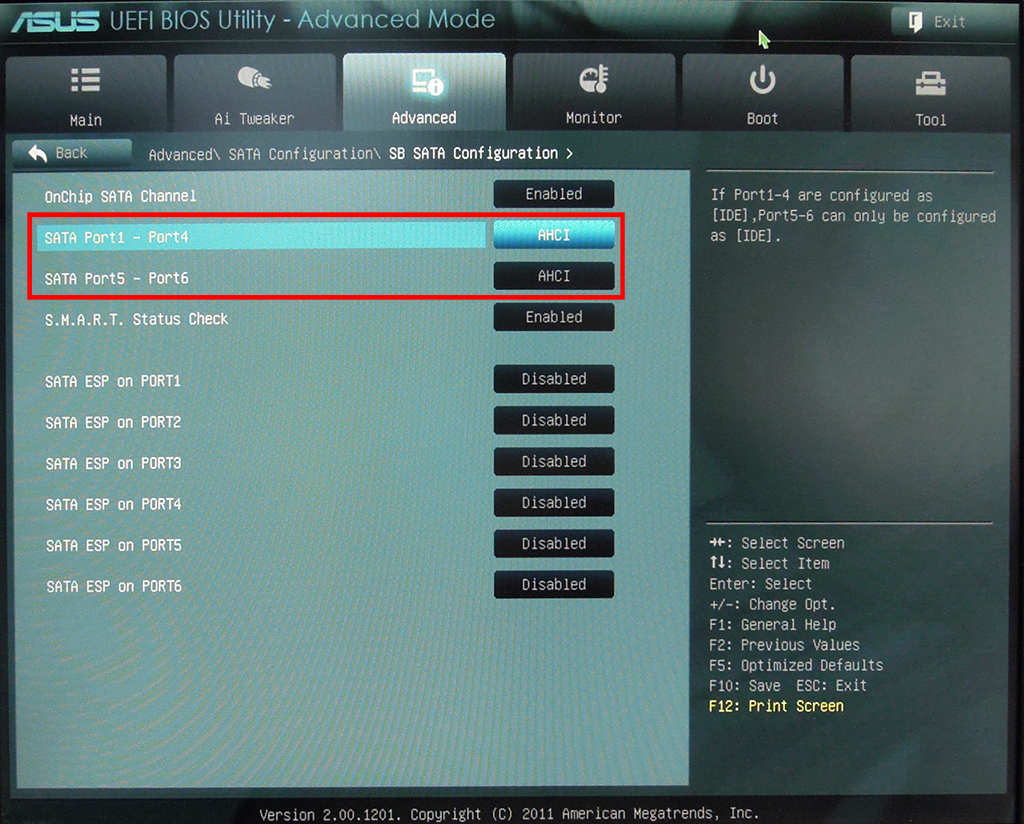
BIOS Screenshot – IDE/AHCI-Mode
Windows 8/8.1 and Windows 10
The Windows registry needs to be modified for the Standard AHCI driver to load upon next boot. The necessary changes must be applied to two registry keys:
[HKEY_LOCAL_MACHINE\SYSTEM\CurrentControlSet\Services\storahci]
"Start"=dword:00000000
[HKEY_LOCAL_MACHINE\SYSTEM\CurrentControlSet\Services\storahci\StartOverride]
"0"=dword:00000000
If you do not want to modify the registry by hand, you can also apply these changes automatically by importing this registry file. Please download the file to your computer and execute it by double-clicking.
Then you can safely switch the SATA mode to AHCI in the computer’s BIOS.
Replacing an OEM SATA driver with the Windows’ Standard AHCI driver
If you are not sure how to replace an existing driver, please follow these instructions consisting of seven easy and safe steps:
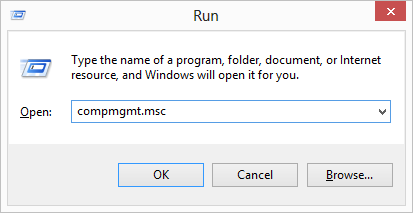
- Please open the computer management app by running the file compmgmt.msc.
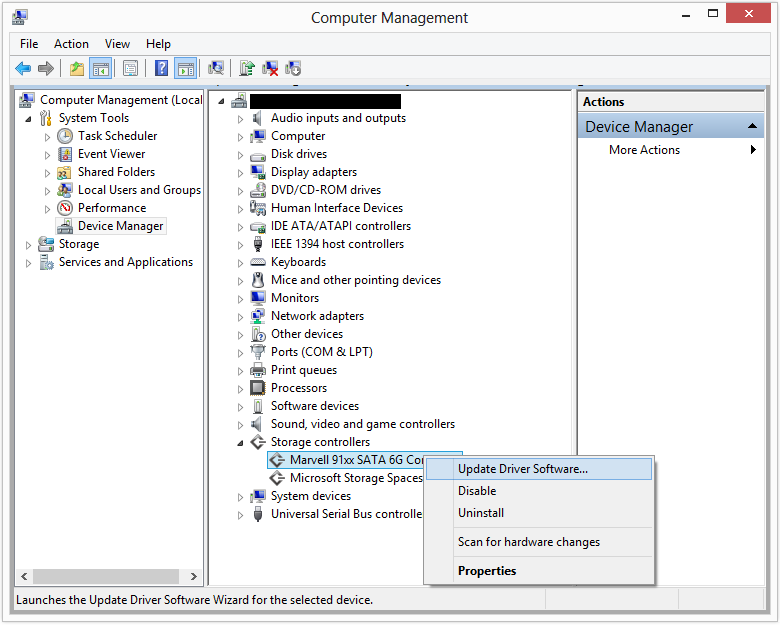
- Please open the Device Manager and navigate to the category “SCSI and RAID controllers” or “Storage controllers”.
- Please select the appropriate controller and click “Update Driver Software” from the controller’s context menu.
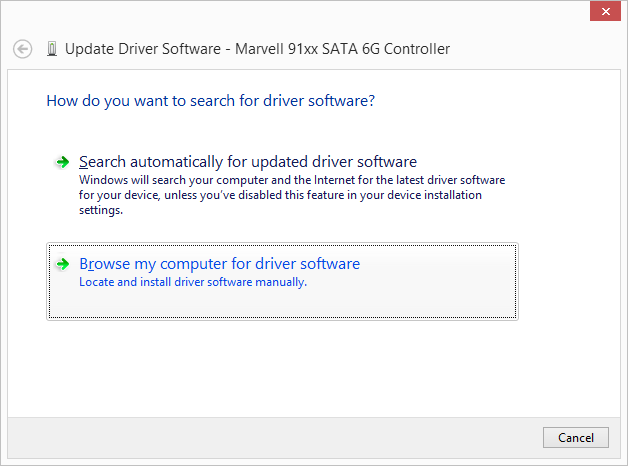
- In the next dialog, please select “Browse my computer for driver software”.
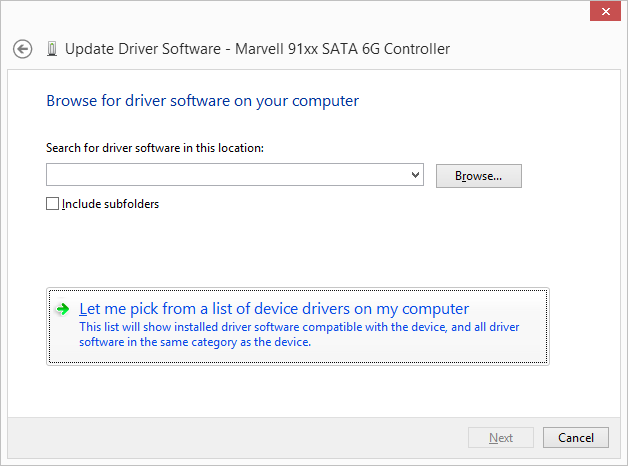
- On the next page, please opt to select a driver manually.
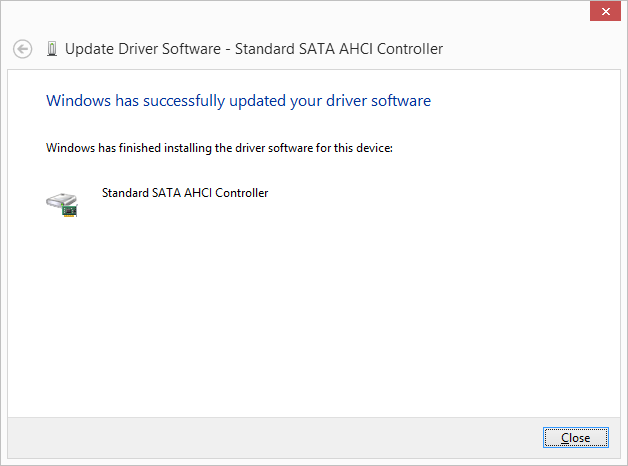
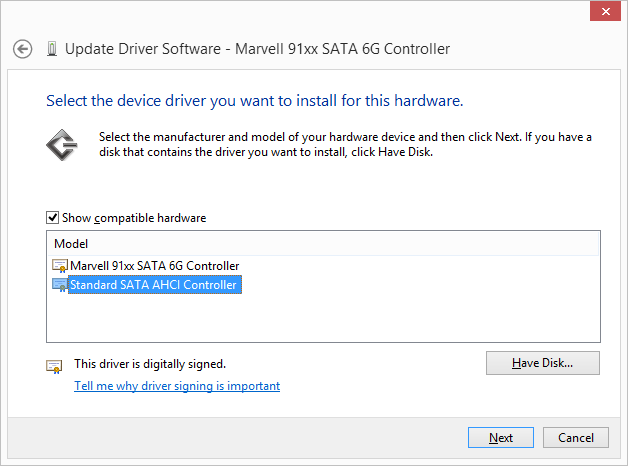
- Windows will show you a list of compatible drivers installed on your system. Here, please select the “Standard AHCI SATA controller” and click “Next”.
- Windows will the replace the OEM driver with the standard driver provided by Microsoft. After the driver has been replaced successfully, you may be prompted to restart your computer. Upon next system start the controller will be running the Standard AHCI driver.