This is how O&O AutoBackup works
Copying your files starts automatically whenever you connect a hotplug-capable device to your PC. You can see when copying is complete in the task bar symbol or status window in the program, and then you can safely remove your device.*
There are just a few settings that you have to take care of.
1. Start O&O AutoBackup. In the programs start window klick on the + Symbol to set up a job. First you choose a name for the job, then you can drag and drop individual files or folders that you want to backup into the program window. Alternatively you can do this by hitting “Add directory” and “Add files”. Once you’re ready, hit “Next”.
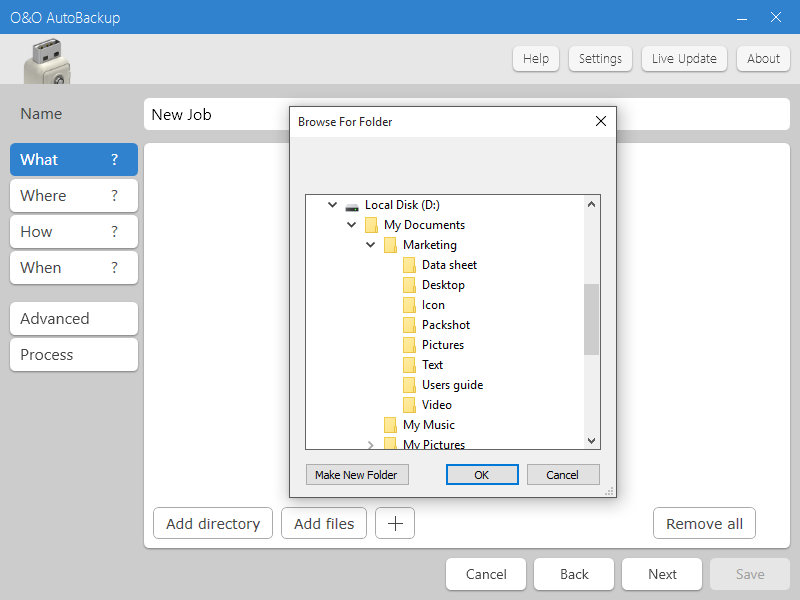
Add new job
2. Now you decide where to save your copied data. Select a target volume - O&O AutoBackup supports all devices recognized as “hotplug-capable“, in other words devices that can be connected and removed during running operations. If your device was already connected before you started O&O Autobackup then you can select it from the list of available storage devices. Otherwise, connect your device now, select it from the list and click “Next”.
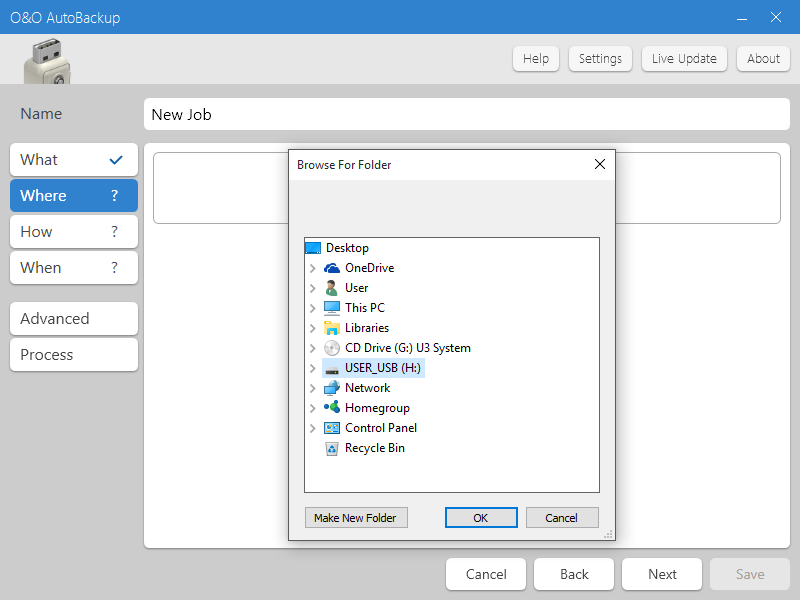
Select a target volume
3. Now you can choose how your data should be backed up.
Archive Mode
Copies all folders and files in a new sub-folder.
Insert Mode
Copies new files, folders and changes. Nothing is deleted.
Synchronisation Mode
Synchronizes files and folders and overwrites data.
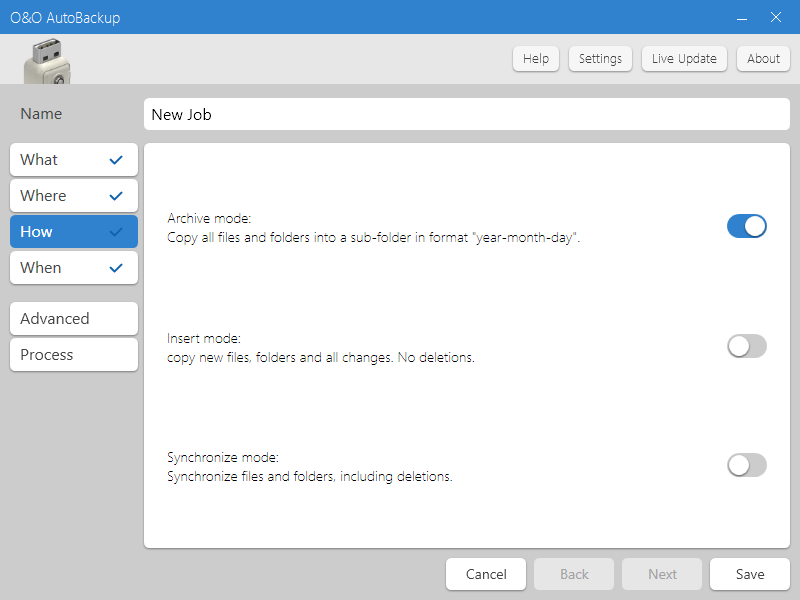
How should your data be backed up
4. Finally, choose when your data is backed up. You can then save your jobs. Your job will now start at the required time but you can also start a job manually at any time.
For every job you create, O&O AutoBackup places a new “tile“ on the start page. You can then start, change or delete these jobs.
Under Advanced settings, you can define batch commands that can be run instead of default actions. It’s also possible to modify the structure of the directory for saving data/folders on the destination drive. The option “Use subfolder“” will let you specify a separate folder name. With the option “Attach the computer name in the path“, the name of the computer will be added to the path on the destination drive where the files/folders will be saved.* Once the copying process is completed, please don’t forget to use your operating system’s “Safely remove hardware” method before disconnecting the external disk.
* Once the copying process is completed, please don’t forget to use your operating system’s “Safely remove hardware” method before disconnecting the external disk.